"The conversation about waterproofing almost always happens after installation — when it should happen before. A solar system lasts 25 years. Roof membranes on flat roofs last 8–12. Plan the sequencing right from the start."
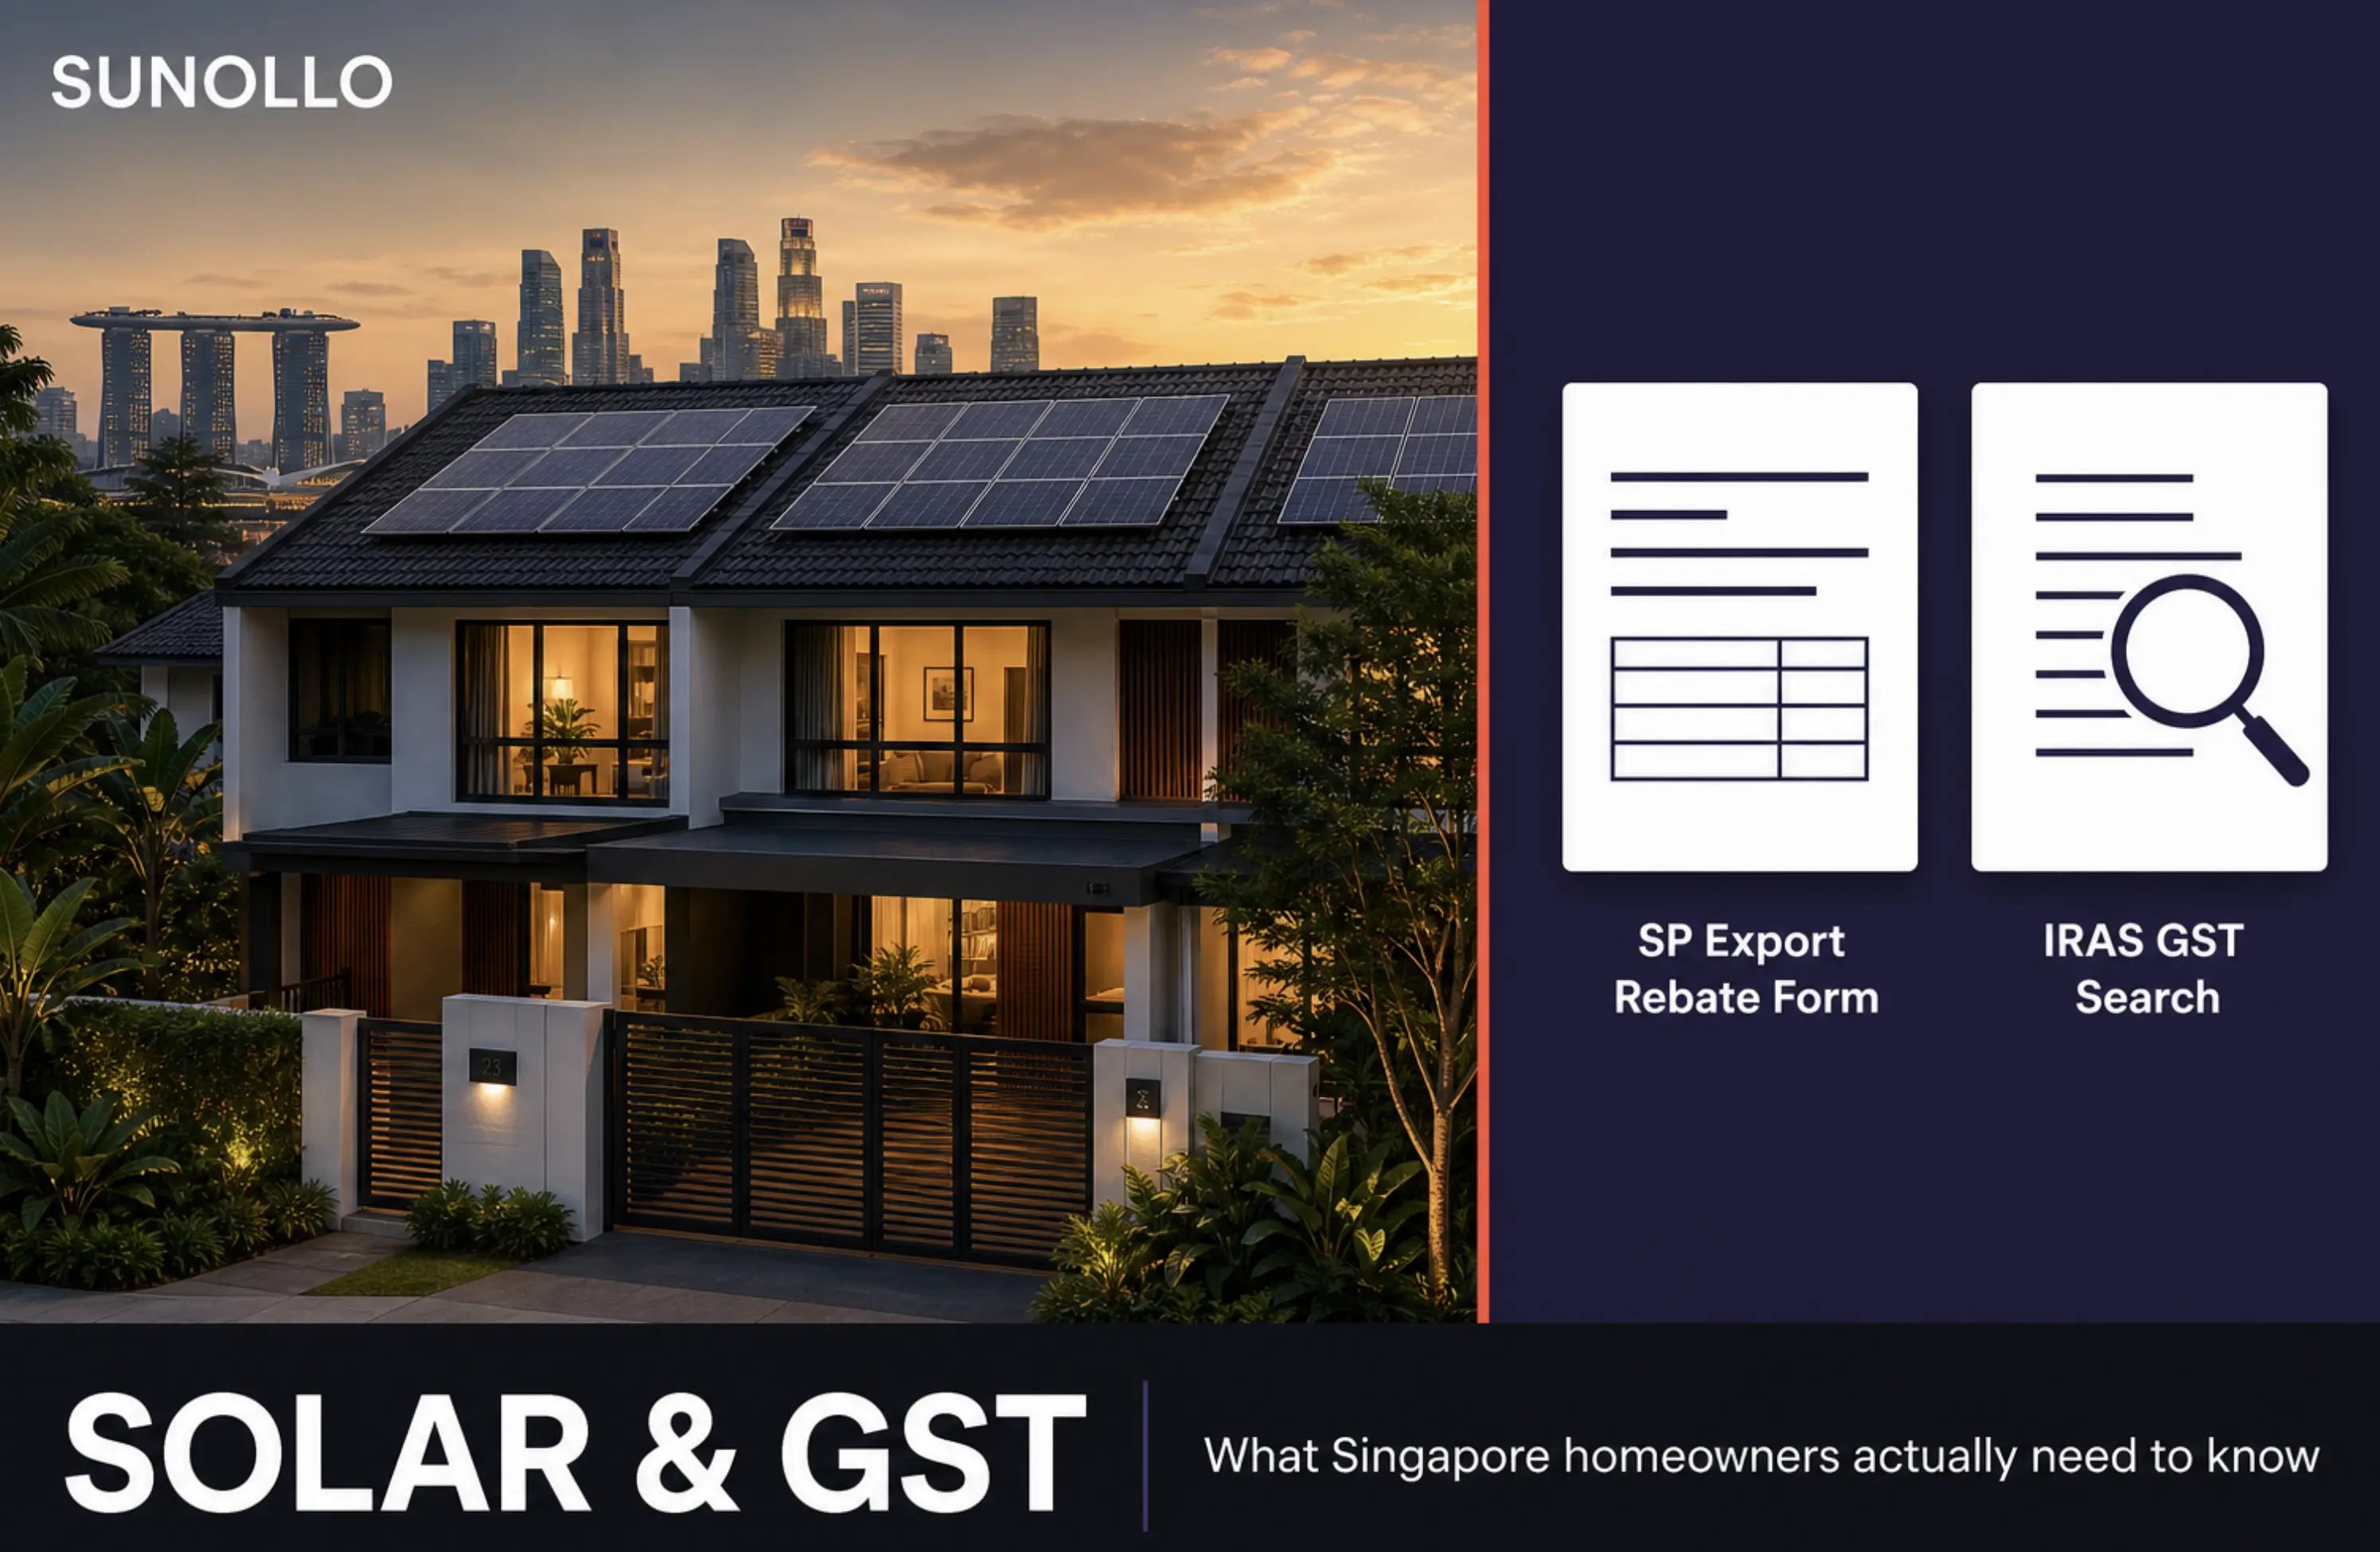
Why Waterproofing and Solar Must Be Planned Together
Most homeowners think about solar and roofing as separate decisions. They are not. The moment you install a solar array on your roof, you are committing to that roof surface for the next 25 years — the operational life of your panels. Any waterproofing maintenance, membrane re-application, or roof repair that becomes necessary during that period will need to work around a fixed, weighted structure on top of the roof.
This is not a reason to delay solar. It is a reason to get the sequence right before you start.
The core principle is simple: assess and remediate any waterproofing issues before the panels go on, not after. The cost of lifting a 20-panel array, re-waterproofing a flat concrete roof, and remounting the system is several times the cost of waterproofing the roof before installation. The cost of a water leak finding its way through a ceiling, into electrical fittings, or down a wall cavity is higher still — and the damage may not be immediately visible.
Singapore's climate amplifies this. With approximately 2,400mm of annual rainfall, monsoon deluges that can drop 80mm in an hour, and roof surface temperatures regularly exceeding 70°C, waterproofing systems are under some of the most demanding combined loads on the planet. They need to be in good condition before a solar system extends their working life to 25 years.
This guide covers every combination: roof material type, waterproofing approach, mounting method, and the sequencing decisions you need to make before installation day.
The Four Roof Types in Singapore — and What Each Means for Solar Waterproofing
1. Tiled Pitched Roof
The tiled pitched roof is Singapore's most common landed residential roof type — the signature roofline of Serangoon Garden, Siglap, Farleigh Avenue, and thousands of other estates. Pitched at angles typically between 15° and 35°, these roofs use clay or concrete tiles laid in overlapping rows to shed water naturally. No membrane. No coating. Just the physics of overlapping tile geometry directing rain off the surface.
This matters enormously for solar: a well-maintained tiled pitched roof is already a highly effective waterproofing system by its very nature. The tiles themselves are the primary barrier, and they have been doing this job for decades on most Singapore homes.
The Waterproofing Mechanism on Tiled Roofs
Water does not flow over the surface of tiled roofs — it flows under and between the tiles in a controlled way, guided by the tile geometry, the battens, and the sarking (where present) to the gutters and valleys. The key waterproofing elements are:
- Ridge and hip mortar: The ridge capping tiles at the apex of the roof are bedded in mortar and often pointed with a flexible sealant. This is the highest-wear waterproofing element on a tiled roof — it is exposed to direct sun, thermal cycling, and mechanical stress.
- Valley flashing: Where two roof planes meet in a valley, metal or aluminium flashing channels water from both surfaces into the gutters. Blocked or damaged valley flashing is the most common cause of tiled roof leaks.
- Verge and eave details: Edge tiles at the verge and eave are bedded and pointed to prevent wind-driven rain from entering the roof structure.
- Pipe and vent flashings: Any pipe, vent, or antenna penetrating the tile surface requires a flashing collar to prevent water ingress around the penetration.
What to Inspect and Remediate Before Solar on a Tiled Roof
Before solar installation on a tiled pitched roof, Sunollo's team inspects — and homeowners should independently verify — the following:
Ridge and hip condition: Walk the ridgeline (from a safe vantage point or via drone inspection) and look for cracked mortar, spalled pointing, or tilted ridge caps. Any failed ridge mortar should be raked out and replaced with a flexible polymer-modified mortar or ridge tile adhesive. This is a straightforward job for a roofing contractor and typically costs S$300–800 for a standard landed home ridge.
Cracked or broken tiles: Each cracked tile is a potential water ingress point. Before solar installation, replace every cracked tile — they are inexpensive (S$5–20 each for standard concrete or clay) and far cheaper to replace when the roof is unobstructed than when it requires working around a panel array.
Valley condition: Clear debris from valleys (leaf litter, bird nesting material, moss) and inspect the valley flashing for rust, holes, or deformation. Replace any failed valley flashing before installation. A blocked valley during Singapore's 80mm/hour monsoon rain events will back up water under adjacent tiles faster than any other roof failure mode.
Pipe and vent flashings: Check that all penetration flashings are intact and properly sealed. The solar installation itself will not penetrate the tile surface (tile hook rail mounting uses no through-tile drilling), but existing poorly-sealed penetrations can create leaks that are later attributed to the solar installation.
Sarking condition (if present): Some Singapore homes have sarking — a membrane layer under the tiles above the battens. If sarking is present and damaged, it should be addressed before solar. If it is absent (as in most pre-1990 Singapore homes), this is not typically a problem for pitched roof waterproofing, as the tile geometry handles water shedding independently.
How Rail-Based Tile Hook Mounting Interacts with Waterproofing
The good news for tiled roof homeowners: Sunollo's tile hook rail system is specifically designed to preserve the roof's waterproofing integrity without any drilling through tiles.
The process: individual tiles are carefully lifted (not removed, not cut), and stainless steel hooks are fixed to the roof battens beneath using screws into the timber batten. The tiles are then replaced over the hooks, sitting naturally in their original position. The hook's foot profile is designed to sit under the tile without lifting it — creating a weatherproof seal through tile geometry, exactly as the original roof intended.
At the hook-batten fixing point, Sunollo applies a weatherproof EPDM gasket beneath the hook foot, providing a secondary seal even if any water tracks under the tile. This is belt-and-braces waterproofing at every fixing point.
The aluminium rails and panel clamps sit entirely above the tile surface. No element of the mounting system penetrates below the tile surface except the hook feet, which are sealed as described above. Water shed by the panels flows onto the tile surface below the array and continues its natural path to the gutters.
One important note for pitched roof solar: The area under a panel array is shaded from direct sun and rain. Moss and lichen growth under panels is slower than on exposed tiles, but condensation can accumulate. This is not a waterproofing concern per se, but it means post-installation tile inspection (part of Sunollo's annual SunolloCare maintenance) is important to catch any tile deterioration that develops in the sheltered microclimate under the array.
Timing: Before or After Solar?
For tiled pitched roofs: address any identified issues before installation. Replace cracked tiles, repoint ridges, clear valleys. These are small jobs that are much more difficult to complete cleanly once panels are mounted over part of the roof surface. Post-installation, the roof is not inaccessible — panels can be individually dismounted — but working between and around an installed array is slower, more expensive, and requires more care.
2. Flat Concrete Roof
Flat concrete roofs are found on Singapore terrace houses, many semi-detached and detached homes built between the 1970s and 1990s, and on flat-roof extensions and car porches of otherwise pitched-roof homes. Unlike tiled pitched roofs, flat concrete roofs rely entirely on an applied waterproof membrane or coating — the concrete slab itself is porous and non-waterproof. The membrane is doing all the work.
This makes flat concrete roofs the most waterproofing-critical surface for solar installation planning. It also makes them the most important roof type to assess before committing to a solar installation schedule.
How Flat Roof Waterproofing Works
A properly waterproofed flat concrete roof in Singapore has:
- A screed layer (typically 25–50mm sand-cement screed) laid over the structural slab, sloped at 1:80 to 1:50 toward drainage points to ensure standing water does not accumulate.
- A primer coat bonding the waterproofing system to the screed.
- One or more coats of waterproof membrane — the primary barrier. This is the most important layer.
- A protective topping — either a cement screed, ceramic tiles, or UV-reflective coating to protect the membrane from Singapore's UV radiation and foot traffic.
Waterproofing Systems for Flat Concrete Roofs — Singapore Options
Several waterproofing system types are used on Singapore residential roofs. Each has different lifespans, application methods, and compatibility with solar mounting systems:
Liquid-applied polyurethane membrane (most common for residential): A two-component polymer system applied by roller or spray in multiple coats to form a seamless, flexible membrane. Lifespan: 8–12 years with UV protection coat. Highly flexible — accommodates slab movement and thermal cycling. Compatible with solar ballasted frames (the frame feet sit on the membrane surface). Cost to apply: S$12–22/sqm depending on roof condition and system specification.
Acrylic elastomeric coating: A single or multi-component water-based system applied by roller. Excellent UV reflectivity, helping reduce roof surface temperature. Lower cost (S$6–15/sqm) but shorter effective lifespan (5–8 years). More maintenance-intensive. Good choice for a re-coat when the underlying membrane is in good condition.
Bituminous (modified bitumen) membrane: A torch-applied or cold-applied sheet membrane. High durability (12–20 years) and excellent puncture resistance — beneficial if the roof is regularly accessed. Heavier and less flexible than polyurethane. Requires a skilled applicator. Cost: S$18–35/sqm installed.
TPO (Thermoplastic Polyolefin) or PVC sheet membrane: Heat-welded sheet membranes offering 15–25 year lifespans with excellent UV and chemical resistance. Typically used on larger commercial roofs but increasingly specified on high-end residential projects. More expensive (S$25–50/sqm installed) but the most durable long-term solution for a flat roof that will carry solar for 25 years.
Crystalline waterproofing (Xypex/Penetron type): A cementitious system applied directly to the structural slab that forms crystals within the concrete pores to block water passage. Not a surface coating — it becomes part of the concrete. Excellent for below-grade or damp-proofing applications; less commonly used as a primary flat roof waterproofing system but valuable as a base treatment under other systems when the slab has existing moisture issues.
What to Inspect on a Flat Concrete Roof Before Solar
The critical pre-installation inspection for a flat concrete roof:
Check for ponding water: After a rain event, inspect the roof within 30–60 minutes. Any area with standing water after 45 minutes indicates inadequate slope or blocked drainage — this must be corrected before solar installation. A ballasted solar frame placed in a ponding zone will trap water permanently under the frame, accelerating membrane degradation.
Assess the membrane condition: Look for blistering, cracking, delamination at edges and upstands, and any areas where the membrane has worn through to expose the screed beneath. If more than 20% of the roof surface shows visible deterioration, a full re-membrane is advisable before solar. Spot repairs on a deteriorating membrane are a short-term fix.
Check upstands and perimeter edges: The most common failure points on flat roofs are the upstand junctions — where the horizontal membrane meets vertical parapet walls, vent pipes, or roof penetrations. These areas experience the most movement and are where delamination typically begins. Ensure upstand membranes extend at least 150–200mm up vertical surfaces and are fully bonded.
Verify drain functionality: Clean all roof drains of debris and confirm water flows freely. Identify whether your roof has a single drain or multiple drains, and confirm the solar panel layout will not obstruct any drain or the drainage path to that drain.
Assess the screed: Tap the screed surface across the roof. Hollow sounds indicate delaminated screed that has separated from the slab. Delaminated screed areas should be cut out and repoured before a new membrane is applied — applying a membrane over hollow screed creates a weak foundation that will fail under the weight and thermal cycling of a solar array.
The Sequencing Rule for Flat Concrete Roofs
This is the most critical sequencing decision in Singapore residential solar: if a flat concrete roof needs re-waterproofing, do it before solar installation — not after.
A full flat roof re-membrane on a standard terrace house (typically 60–120 sqm of roof area) requires the roof surface to be free of obstructions. After solar installation, the ballasted frame system covers 60–80% of the roof surface. Re-waterproofing under an installed system is not impossible, but it requires:
- Temporary dismounting of the panel array (typically 8–12 panels for a terrace house)
- Safe storage of panels and racking hardware during membrane work
- Re-mounting and recommissioning of the system after membrane curing
- Additional scaffolding or working platform requirements if the roof has parapet walls
The total cost of this sequence — dismount, re-membrane, remount — is typically 2–3 times the cost of re-waterproofing before installation. More importantly, the coordination complexity introduces scheduling risk and temporarily eliminates solar generation income.
Practical rule: If your flat concrete roof membrane is more than 7 years old and you are planning solar, invest in a professional membrane assessment (typically S$200–400 for a full report) before committing to an installation timeline. If the membrane needs replacement in the next 3–5 years, do it now before the panels go on.
How Ballasted Frame Mounting Interacts with the Membrane
Sunollo's ballasted frame system for flat roofs is designed to work with the waterproof membrane rather than against it. Key design features:
No penetrations: The frames are held by weight — the panels themselves plus additional ballast blocks where wind loading calculations require it. Nothing passes through the membrane. This is the defining advantage of ballasted mounting: it preserves membrane continuity completely.
Rubber foot pads: Each frame leg sits on a rubber or EPDM pad rather than directly on the membrane surface. This distributes the point load over a larger area, preventing concentrated pressure that could indent or damage the membrane, and provides a compressible buffer for thermal movement.
Drainage clearance: Frame design keeps the membrane surface visible and accessible between frame rows. Sunollo plans frame placement around existing drainage paths — no frame leg or ballast block is placed within 300mm of a drain or in a drainage channel.
Maintenance access: The modular frame design allows individual frame sections to be lifted and moved to access the membrane beneath for inspection or spot repairs. This is relevant for the SunolloCare annual maintenance inspection — the team can visually check the membrane condition in accessible zones each year.
Weight loading: A typical 10-panel ballasted array on a terrace house adds approximately 15–20 kg/sqm across the footprint of the array. This is within the design load of a standard Singapore reinforced concrete flat roof slab (typically rated at 150–200 kg/sqm for access roofs) but Sunollo always confirms structural adequacy, particularly for older pre-1980 construction where concrete quality may vary.
3. Metal Roof (Corrugated and Trapezoidal)
Metal roofs are increasingly common on Singapore homes — particularly on newer builds, renovated properties, car porch extensions, and rear extensions where the roof connects to an existing tiled pitched roof. Corrugated and trapezoidal metal sheeting (Zincalume, Colorbond, galvanised steel) is popular for its lightweight properties, rapid installation, and modern aesthetic.
The Waterproofing Mechanism on Metal Roofs
Unlike flat concrete roofs, metal roofs have no applied membrane. The metal sheeting itself is the waterproof barrier. Water sheds off the pitched surface exactly as it does on tiled roofs — the slope gradient takes care of removal. The waterproofing vulnerabilities are concentrated at specific details:
- Sheet laps: Where one sheet overlaps another (typically 1–1.5 corrugation widths), the lap joint should be sealed with butyl tape or mastic sealant. Over time, UV degradation and thermal cycling cause sealants to harden and crack, creating a capillary gap that can admit wind-driven rain.
- Fixing points: Metal roofs fixed with self-drilling screws through the sheet surface have a rubber washer under the screw head that provides the waterproof seal at each penetration. These washers degrade over 10–15 years and should be inspected and replaced during any pre-solar roof assessment.
- Ridge, hip, and barge flashings: Pressed metal flashings at ridges and edges are either pop-riveted or screwed to the sheeting. The seam between flashing and sheeting is typically silicone sealed. Like all silicone applications, this needs inspection every 7–10 years.
- Wall-roof junctions: Where a metal roof meets a masonry wall, the junction is typically flashed with a step flashing or turn-down flashing set into a chase in the masonry. This is a common failure point if the mortar chase has not been maintained.
Pre-Solar Inspection Checklist for Metal Roofs
Lap sealant condition: Inspect sheet laps at eye level or from below the roof if there is ceiling access. Cracked, hardened, or missing lap sealant should be replaced with a fresh application of compatible butyl or polyurethane sealant. This is a 1–2 hour job for a roofer and costs S$200–600 depending on roof size.
Screw washer condition: Check a representative sample of screw fixings for washer deterioration. Compressed or missing washers should be replaced — a set of stainless steel screws with new EPDM washers costs S$50–100 and the replacement work is straightforward.
Rust assessment: Galvanised steel sheeting typically has a lifespan of 15–25 years depending on coating weight and coastal exposure. For roofs approaching the end of their coating life (visible red rust at cut edges, scratches, or around fasteners), consider whether the roof sheeting itself needs replacement before committing a 25-year solar investment to it. Coastal Singapore properties experience accelerated corrosion — if you are within 500m of the sea, apply this caution more strictly.
Ridge and flashing integrity: Check all pressed metal flashings for separation from the sheeting and any failed sealant at joints. Pay particular attention to wall-roof junctions, which are under movement stress from differential thermal expansion between the masonry wall and the metal roof.
How Direct Metal Clamp Mounting Preserves Waterproofing
The crucial advantage of direct metal clamp mounting for corrugated and trapezoidal roofs is that it creates zero new penetrations in the roof surface. Clamps grip the raised ribs or corrugations of the sheeting using precision-machined jaws — no drilling, no screws through the roof surface, no new sealant joints to maintain.
This means the waterproofing risk profile of a metal roof does not increase at all from solar installation. The existing sheet-to-sheet lap seals and screw washers remain the only waterproofing-relevant details, and these pre-existed the solar installation.
The indirect benefit: panel coverage of the metal surface reduces UV exposure and temperature cycling on the sheeting beneath. Lower surface temperatures and less direct UV significantly extend the working life of the laps seals and screw washers under the array. Panels as a weather shield can actually extend the life of underlying metal roofing components.
One consideration: Some corrugated metal roofs have significant thermal movement — expansion and contraction over Singapore's daily temperature range of 25°C to 45°C can move sheet metal by 3–5mm per linear metre. Sunollo's metal clamp systems include sliding rail mounts that accommodate this movement, preventing the clamps from applying bending stress to the sheeting at the mounting points.
4. Standing Seam Metal Roof
Standing seam metal roofs — the premium end of residential metal roofing, found on architecturally designed homes, Good Class Bungalows, and high-end renovations — represent the lowest waterproofing risk of any roof type for solar installation. The standing seam design (raised vertical folds running from ridge to eave, with no exposed fasteners) is itself a high-performance weatherproofing system, and the solar mounting method perfectly complements it.
The Waterproofing Mechanism of Standing Seam
Standing seam panels interlock at the raised seam in a double-fold or snap-lock joint. This joint is:
- Designed to allow thermal movement along the seam length without distortion
- Fully concealed from direct rain exposure — no water reaches the seam joint itself
- Free of any surface fasteners — there are no screw penetrations through the panel face
The result is a roof surface with essentially no externally-visible waterproofing vulnerabilities beyond the ridge cap, eave detail, and wall junctions. When these details are properly installed and maintained, standing seam metal roofs routinely last 40–60 years without waterproofing failure.
Pre-Solar Assessment for Standing Seam
The inspection checklist for standing seam before solar is shorter than for any other roof type:
- Seam condition: Check for any deformed, split, or otherwise compromised seam profiles. Standing seam is robust, but mechanical damage (fallen branches, dropped tools during past maintenance work) can damage seam folds.
- Ridge cap: Inspect the ridge cap detail — typically a folded cap piece that fits over the top of the standing seams. Ensure it is fully engaged and any sealant at the ridge ends is intact.
- Eave and valley details: Check gutter hangers and eave trim for security and sealant integrity.
- Wall junctions: As with corrugated metal, the wall-to-roof junction flashing is worth inspecting.
For most standing seam roofs in good condition, no waterproofing work is required before solar installation. The inspection is a due-diligence step, not an expectation of finding problems.
How Seam Clamp Mounting Works with Standing Seam
Sunollo's seam clamp mounting for standing seam roofs is the gold standard of solar waterproofing integration. The precision-machined seam clamp grips the folded seam with controlled torque using set screws that bear against the seam's lower portion — never penetrating it. The clamp distributes load along the seam profile, and the rails and panels mount directly to the clamps.
The result: zero new penetrations, zero new sealant joints, zero waterproofing risk added by the solar installation. The roof's waterproofing system is entirely unchanged by the presence of the solar array. This is why standing seam metal is architecturally specified for premium homes where the aesthetic and durability of the roof must not be compromised.
The Before-or-After Decision Framework
The most common question homeowners ask is: "Should I waterproof my roof before or after installing solar?" The answer is almost always before, but the nuance depends on roof type and waterproofing condition.
| Roof Type | Waterproofing Condition | Recommendation | Timing |
|---|---|---|---|
| Flat Concrete | Membrane < 5 years old, good condition | Solar now — re-waterproof in 5–8 years | Plan the future re-waterproof window into solar scheduling |
| Flat Concrete | Membrane 5–8 years old | Inspect and test before solar decision | Re-waterproof first if membrane shows degradation |
| Flat Concrete | Membrane > 8 years or failed | Re-waterproof before solar — no exceptions | Waterproof first, install solar 2–4 weeks after membrane cure |
| Tiled Pitched | Tiles intact, ridge sound, valleys clear | Solar now — tile system is inherently sound | No waterproofing work required pre-install |
| Tiled Pitched | Cracked tiles, spalled ridge, blocked valleys | Remediate first, then solar | Tile repairs before installation; typically 1–3 days of roof work |
| Metal (corrugated/trapezoidal) | Laps sound, fasteners good, no significant rust | Solar now | No waterproofing work required |
| Metal (corrugated/trapezoidal) | Failed lap seals, rusted fasteners | Repair first, then solar | Sealant and fastener replacement before installation |
| Standing Seam Metal | Any condition (seams intact) | Solar when ready — inherently low risk | Inspection only; waterproofing work rarely required |
What Happens If Waterproofing Fails After Solar Is Installed
This is the scenario most worth avoiding — and it happens more often than the industry discusses openly. A common pattern in Singapore: homeowners install solar on a flat roof with an ageing membrane, the membrane fails 18–24 months after installation, and they find themselves with a water ingress problem that requires lifting the solar array to fix.
The consequences unfold in layers:
Water ingress damage: A failed flat roof membrane can allow water to penetrate the concrete slab and track along ceiling voids, into walls, and eventually damage plasterwork, electrical fittings, furniture, and timber flooring. Remediation costs can range from S$2,000 for minor ceiling staining to S$20,000+ for significant structural drying and reinstatement work.
Solar system disruption: Addressing the underlying roof means temporarily dismounting some or all of the solar array. For a standard 10-panel flat roof system, this is a 1–2 day job generating a service cost of S$800–2,000. During dismounting and remounting, the system is offline and generating no electricity savings. If the remounting is not done carefully, it may affect panel alignment, monitoring connectivity, or DC cable routing.
Warranty complications: If a water leak damages the inverter or panel junction boxes (mounted on the roof or wall), insurance and warranty claims can become complicated if the root cause is a pre-existing waterproofing condition that should have been remediated before installation. Sunollo's pre-installation roof assessment is partly designed to protect the homeowner from exactly this scenario — if we identify a concerning membrane condition before installation, we will say so.
The simple protection: A pre-installation waterproofing assessment costs S$200–400. A professional re-membrane of a terrace house flat roof costs S$3,000–8,000. Neither figure comes close to the cost of a mid-system membrane failure — which can easily reach S$15,000–30,000 in total remediation costs including solar system disruption.
Combining Waterproofing Work with Solar: How to Coordinate
If your roof needs waterproofing work before solar can proceed, the coordination sequence matters for minimising disruption and ensuring the best outcome:
Step 1: Waterproofing Assessment (Week 0)
Commission a professional waterproofing assessment from a qualified roofing contractor or waterproofing specialist. The assessment should include a visual inspection, tap test of the screed (for flat roofs), moisture meter readings at drainage points and upstands, and a written report with recommendations. Cost: S$200–400. Ask specifically for the estimated remaining service life of the existing membrane and what membrane system they would recommend for a 25-year solar installation.
Step 2: Solar Design Finalised Before Waterproofing (Week 1–2)
Share your provisional solar design with the waterproofing contractor before they begin work. This is important because:
- The panel layout will determine which areas of the roof are covered (and receive reduced UV exposure) vs exposed. The waterproofing spec may be adjusted accordingly.
- Ballasted frame positions on flat roofs will concentrate load at specific points — the waterproofing contractor can reinforce the membrane in those areas.
- Any conduit penetrations through the roof surface (for DC cable routing on flat roofs) can be planned and incorporated into the waterproofing work, with purpose-designed pipe flashings built into the new membrane.
Step 3: Waterproofing Work (Week 2–4 depending on system)
Membrane application on a residential flat roof typically takes 2–5 days. Polyurethane systems require 24–48 hours of curing per coat; bituminous sheet systems can be walkable within hours but need a full 7-day cure before heavy loading. Do not allow solar frame installation before the membrane has reached its full cure specification — ask the waterproofing contractor for a written sign-off on cure completion.
Step 4: Conduit Penetration Flashing (Done by Waterproofer, not Solar Installer)
If your solar installation requires any penetration of the flat roof surface for cable routing (common on terrace houses where the main electrical panel is on a different floor), the penetration sleeve and flashing should be installed and waterproofed by the waterproofing contractor, not by the solar installer. This ensures the penetration is fully integrated into the waterproofing system and covered under the waterproofing warranty.
Step 5: Solar Installation (Week 4–6)
Once the membrane is fully cured and the conduit penetrations are properly flashed, solar installation can proceed. The solar team should be briefed on the new membrane and instructed to protect it during installation — rubber sole boots only on the roof surface, no tools dropped, no abrasive materials dragged across the surface.
Singapore-Specific Considerations
The Tropical Climate Challenge
Singapore's climate creates waterproofing conditions unlike almost anywhere else in the developed world:
- Rainfall intensity: Singapore receives approximately 2,400mm per year, frequently delivered in short, intense bursts (monsoon rain events exceeding 80mm/hour are not unusual). Any drainage deficiency that would be a minor nuisance in a temperate climate becomes an active flood risk in Singapore.
- UV intensity: Singapore sits 1.3° north of the equator. UV Index regularly reaches 11–14 during midday, among the highest in the world. Unprotected polyurethane membranes degrade significantly faster in Singapore's UV environment than the product datasheets (often written for temperate climates) suggest. Always specify a UV-resistant topcoat or sacrificial UV protection layer over any polyurethane or acrylic membrane.
- Thermal cycling: Roof surface temperatures oscillate between 35°C overnight and 70–80°C at solar noon. This 40°C daily swing imposes significant thermal stress on all roofing materials, accelerating the degradation of sealants, lap joints, and membrane bonds at edges and upstands.
- Biological growth: Singapore's humidity sustains moss, lichen, and algae growth on roof surfaces faster than in drier climates. On tiled roofs, biological growth can lift individual tiles and block drainage channels. On flat roofs, root penetration from moss can compromise membrane integrity over time.
BCA and SS 638 Requirements
Singapore's Building and Construction Authority (BCA) governs waterproofing standards for residential construction under the Building Control Act. For solar-related roof work, two areas are relevant:
Roof waterproofing requirements: BCA requires that any roof with a slope less than 10° (i.e., all flat and near-flat roofs) be waterproofed to a minimum standard using an approved waterproofing system. Any re-waterproofing work should use a BCA-approved system and, for older homes, may technically require a permit if structural modifications are involved.
SS 638 (Singapore Standard for solar photovoltaic systems): This standard requires that solar installation on a flat roof not compromise the roof's existing drainage or waterproofing. Specifically, it requires that solar mounting systems on flat roofs maintain clear drainage paths and not introduce new penetrations without proper waterproofing treatment. Sunollo's installation methodology is designed to comply with SS 638 on all roof types.
Monsoon Season Timing
Singapore experiences two main monsoon seasons: the Northeast Monsoon (November to March, wetter) and the Southwest Monsoon (June to September, drier but still significant). The driest months are typically April–May and September–October.
For flat roof waterproofing work requiring extended dry curing, the April–May inter-monsoon period is the optimal window. However, modern polyurethane and acrylic systems are moisture-tolerant enough to be applied in Singapore's year-round humid conditions — skilled waterproofing contractors work year-round here successfully. The key requirement is ensuring no rain falls within 4–6 hours of coat application and that the membrane achieves a minimum 48-hour dry period before any water loading.
Roof Assessment Costs and Waterproofing Pricing Reference
| Scope | Indicative Cost (Singapore, 2026) | Notes |
|---|---|---|
| Professional waterproofing assessment (flat roof) | S$200–400 | Written report with recommendations; essential before solar on any flat roof >5 years old |
| Tile roof inspection and minor remediation (ridge, cracked tiles) | S$400–1,200 | Includes ridge repointing, up to 10 tile replacements, valley clearing |
| Flat roof: acrylic/elastomeric re-coat (60–120 sqm) | S$800–2,500 | Re-coat over existing sound membrane; 5–8 year effective lifespan |
| Flat roof: polyurethane full re-membrane (60–120 sqm) | S$1,500–4,500 | Full screed preparation + primer + 2 PU coats + UV topcoat; 8–12 year lifespan |
| Flat roof: bituminous sheet membrane (60–120 sqm) | S$2,500–6,000 | Longer lifespan (12–20 years); higher upfront cost; specialist applicator required |
| Flat roof: TPO/PVC sheet membrane (60–120 sqm) | S$4,000–9,000 | Premium 20–25 year system; ideal for 25-year solar lifetime matching |
| Metal roof: lap sealant replacement + fastener inspection | S$300–800 | Prevents capillary ingress at sheet laps; recommended every 10–12 years |
| Post-solar: lift, re-membrane, remount (flat roof, 10 panels) | S$5,000–12,000 | Why pre-solar waterproofing is always the right call |
Roof-by-Roof Summary: Sunollo's Waterproofing Approach
When Sunollo surveys your home before installation, our team assesses roof condition as part of the design process — not as a separate service, but as the foundation of a well-planned installation that will still be performing correctly in 2050.
Here is how each roof type maps to a Sunollo system:
- Tiled Pitched Roof → Rail-based tile hook mounting. Zero membrane penetration. Pre-install: remediate cracked tiles, spalled ridge, blocked valleys. Pairs with Radiance (unshaded) or Abundance (multiple angles or partial shade).
- Flat Concrete Roof → Ballasted frame mounting. No penetrations. Pre-install: full membrane assessment; re-membrane if >7 years old or showing degradation. Pairs with any Sunollo system tier; hybrid inverter in Abundance Pro recommended for battery-ready terrace house installations.
- Metal Roof → Direct metal clamp mounting. Zero penetration. Pre-install: lap sealant and fastener check. Solar typically proceedes after a brief inspection with no work required for roofs in good condition.
- Standing Seam Metal → Seam clamp mounting. Zero penetration. Inspection only; waterproofing remediation rarely required. Pairs with Abundance Pro for GCB and premium home configurations.
Frequently Asked Questions
Q: My terrace house flat roof is about 10 years old. Do I need to re-waterproof before solar?
Almost certainly yes, or at least a professional assessment is essential. A 10-year-old polyurethane or acrylic membrane in Singapore's UV environment is at or past the typical service life for those systems. Commission an assessment before committing to a solar installation date. If the membrane needs replacement, doing it before solar will save you significantly more than the cost of the assessment and the waterproofing work.
Q: My tiled roof has no visible cracks or missing tiles. Do I need any pre-solar waterproofing work?
For a tiled roof in visually good condition, the main checks are ridge/hip mortar condition and valley drainage. If your roof is less than 15 years old and ridges appear intact from ground level, you may proceed to solar without waterproofing work. Ask the Sunollo installation team to confirm their roof inspection findings — they will note any concerns during the pre-installation survey.
Q: Can solar panels actually protect my roof from weathering?
Yes, to a degree. Panels covering a tiled or metal roof surface reduce direct UV exposure and temperature cycling on the covered area — both significant accelerants of material degradation in Singapore. The covered portion of a tile roof typically shows less UV bleaching and mortar degradation than the exposed portions over time. On metal roofs, panel coverage reduces the UV-driven degradation of lap sealants in the covered zone. This is a genuine benefit, not just an marketing claim.
Q: The solar installer says they don't drill through tiles. How do they waterproof the hook attachment points?
Sunollo's tile hooks are designed to fix into the roof batten beneath the tile — the tile itself is lifted temporarily to allow access, then replaced over the hook's flat foot profile. At the batten fixing point, a weatherproof EPDM gasket is applied under the hook foot. The tile then sits naturally over the hook with a profile gap that channels any incidental water tracking under the tile downslope — exactly as the original tile-to-tile design intends. There is no sealant required at the hook because the tile geometry handles the waterproofing.
Q: I want to re-tile my roof in the next few years. Should I do that before or after solar?
Before, if the re-tiling is within the next 3–4 years. Re-tiling requires temporary removal of all tiles from the surface being worked on. Doing this with a solar array already installed requires lifting the entire array first — a significant additional cost. If you are planning a full re-tile, schedule solar after the new tiles are installed. If the re-tiling is 5+ years away and the current tiles are structurally sound, solar first is fine — the future re-tiling project will need to include temporary solar dismount as part of its scope and budget.
Q: What warranty does the solar installation have if my roof later develops a leak?
Sunollo's installation warranty covers any water ingress caused directly by the solar installation — for example, a seal failure at a conduit penetration point. It does not cover pre-existing waterproofing conditions or membrane failures unrelated to the solar hardware. This is why the pre-installation roof assessment matters: it establishes the baseline condition of your roof before installation, providing clear documentation of what was pre-existing and what, if anything, the installation could have introduced. For flat roofs, Sunollo's pre-installation assessment specifically notes the membrane condition to protect both the homeowner and the installer.
Q: How does ongoing roof waterproofing maintenance work under SunolloCare?
SunolloCare annual maintenance includes a visual inspection of accessible roof areas during each visit — checking for cracked tiles in the visible zones around the array, inspecting conduit penetration seals, and noting any membrane concerns visible at the frame perimeter on flat roofs. If maintenance findings suggest waterproofing attention is needed, the SunolloCare team will advise accordingly. Waterproofing remediation itself (membrane re-coating, tile replacement, etc.) is outside the scope of SunolloCare but we can recommend qualified contractors. Visit Sunollo Care for full maintenance scope details.
Q: Does the weight of solar panels on a flat roof damage the membrane?
Not when installed correctly. Sunollo's ballasted frame system uses rubber-backed feet that distribute load across the membrane surface rather than concentrating it at a point. The frame design is calculated to keep point loads well within the membrane's rated compressive strength. What can damage a membrane is foot traffic during installation — which is why Sunollo's installation teams use roof protection boards and rubber-soled footwear on flat roof installations.
Planning Your Roof and Solar Together: The Sunollo Approach
The best solar installations are ones where the roof condition was thoroughly assessed and, where needed, remediated before the panels went on. A 25-year solar system is a long-term investment in both energy savings and your home. The roof it sits on needs to be in a condition that supports the full operational life of that investment.
Sunollo's pre-installation survey covers roof condition assessment for all installation types. For homes with flat concrete roofs showing any signs of membrane deterioration, we will provide a clear assessment and, where warranted, pause the installation timeline to allow proper waterproofing remediation before proceeding.
For more on how Sunollo approaches installation on different roof types, see our How We Install guide, the Roof Types knowledge base, and the Mounting Methods guide. If you are ready to discuss your specific roof and the right solar system for it, contact us for a free home assessment.