Protected DC cabling
Cables are supported and protected from weather and damage. Roof and wall entries are finished with the appropriate sealing details.
 THE INSTALLATION GUIDEPermit guide ↗
SINGAPORE LANDED HOMES
See how the panels fit, where the cables run and what to expect on installation day.
Explore the roofA visual guide—not your final installation drawing.
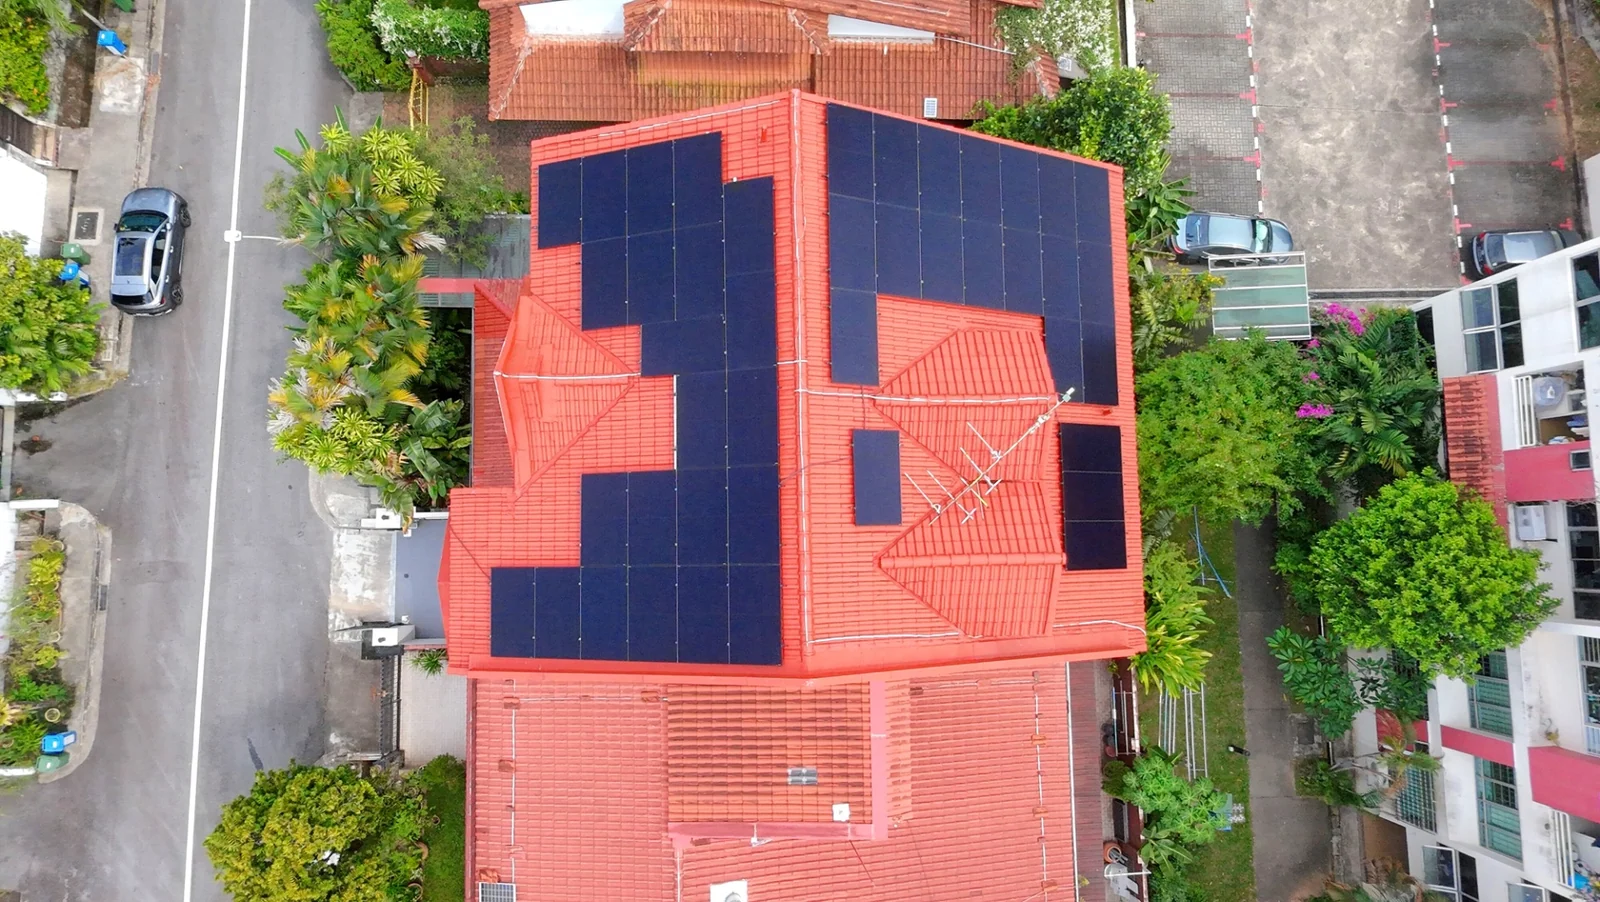
01 / YOUR HOME
Choose a roof to explore. These choices change this guide only—not your order or approved design.
02 / THE PANEL LAYOUT
The team confirms the layout before work: panel count, orientation, roof edges, obstructions and access. A neat pattern must also be a safe, workable layout.
PANEL SPECIFICATION
2,382 × 1,134 mm
30 mm thick. About 2.38 m long by 1.13 m wide.
This is the AIKO-A-MDE72Dw family—not a claim that every Sunollo panel has this size. Your signed proposal and exact model datasheet control.
Manufacturer dimension reference ↗BEFORE WE START, AGREE
Drawings here explain the idea. Your project drawings set the actual number of panels, fixing details, clearances and cable routes.
03 / WHAT TO EXPECT AT HOME
Your team confirms the work dates and access arrangements in advance. Installation can span several visits; this is the sequence, not a one-day promise.
Expect deliveries, tools and roof activity. Tell the team about quiet hours, neighbours and fragile areas.
The LEW confirms whether an outage is needed and agrees the timing. Flag medical equipment, alarms, gates and other essential loads.
Unsafe roof or weather conditions can pause work. Your site lead explains the next safe step.
04 / HOW THE PANELS ARE FIXED
The fixing depends on the roof. We refit tiles around the mounts, choose fixings to suit the metal roof profile, or use supports designed for a flat concrete roof.
Before installation: Please document and tell us about known leaks, cracked or worn tiles, and other existing roof issues. Share dated photos or notes where available. Please don’t climb onto the roof.
Existing roof repairs: You arrange and pay for repairs to pre-existing roof issues. These repairs are not part of Sunollo’s solar installation. If repairs are needed for safe installation, we’ll wait until they’re complete before working on that part of the roof.
Installation cover: Sunollo’s installation cover does not extend to leaks or damage caused by pre-existing roof issues. Our responsibilities for damage caused by our work are unchanged.
05 / THE ROUTE THROUGH YOUR HOME
Solar wiring leaves the roof in protective casing, reaches the inverter, then connects to your home’s electrical board through the required protection.
Cables are supported and protected from weather and damage. Roof and wall entries are finished with the appropriate sealing details.
The electrician provides the required cables, isolators, breakers and protection, then connects to the approved point at your board.
Metalwork is bonded as designed. DC, AC and communication routes are separated appropriately and labelled for future servicing.
06 / THE EQUIPMENT YOU WILL SEE
Equipment belongs in an accessible, suitable place—not wherever a cable happens to end. The exact model sets the mounting method, clearances and appearance.
IN EVERY SOLAR SYSTEM
Converts solar DC power into AC power for your home. It may be wall-mounted or part of an integrated energy system.
Generic outline—not a product photograph. Final size, colour and layout follow your selected model.
Have a battery or EV charger in your proposal?
Select it above to see what changes ↗YOUR INSTALLATION VISITS
Estimated on-site work: 2 days to 1 week.*


We discuss tentative dates and agree the panel layout, cable route, equipment locations and safe access during your sales visit or later, before installation.
Please clear the agreed access area. The crew sets up safely, then fits the panels, cables and equipment.
The assigned LEW (Licensed Electrical Worker) coordinates testing and any required SP inspection.
We explain how to use the system and share your documents and support contacts.
07 / THE PEOPLE AT YOUR HOME
Sunollo coordinates the work from planning to handover.
Your main point of contact. Confirms the plan, dates and next steps.
Leads the crew on site and checks that the work follows the agreed plan.
Oversees delivery and steps in when an issue needs more than one team to resolve.
Tests the system and coordinates any required SP inspection and switch-on.
Sunollo keeps project updates, decisions and support requests in one shared system. The team can pick up where things left off, so you don’t have to chase individual WhatsApp threads or repeat yourself.
Submit a support request or view your open tickets at support.sunollo.com.
08 / BEFORE WE CALL IT COMPLETE
Physical installation, electrical checks, SP clearance and export payments are different steps. Your team explains which are complete and what remains.
Roof finish, fixing, visible sealing, cable support, equipment and labels are inspected. Electrical tests are recorded by the responsible professionals.
The assigned LEW coordinates the applicable SP inspection and turn-on process. Do not switch on the system yourself.
Understand the app where included, normal operation, safe shutdown instructions and who to contact. Do not open equipment or electrical covers.
Keep the as-built layout and wiring drawings, model / serial details, test records, approval records, operating guides and warranty contacts.
Use the permit guide for CS1, PV1, CS5, SP inspection and the separate MOC / NER steps.
Open the permit timeline ↗